How to Make Diorama Scenes: Tips From Someone Who's Made 50+
Alex Rivera
Autor
# How to Make Diorama Scenes: Tips From Someone Who's Made 50+
I've built over fifty diorama scenes now, and honestly, the first twenty were mostly disasters. Crooked placements, clashing colors, layers that looked like a mess—I made every mistake possible. Here's what I learned so you can skip the worst of it.
First, Set Up Your Space
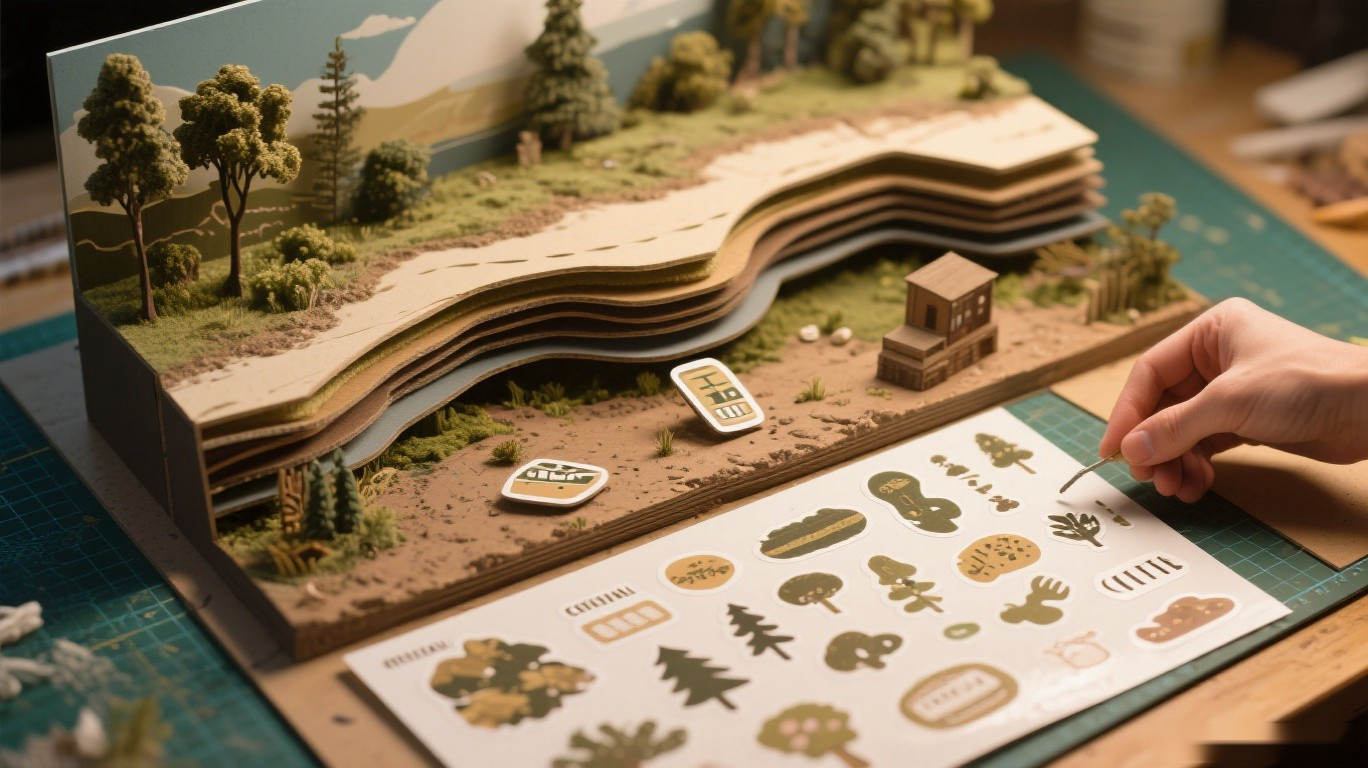
You don't need fancy tools, really. I've seen people buy whole sets of tweezers, alignment rulers, "professional sticker tool kits"—none of it's necessary.
Just clear off a small desk space, about the size of a sheet of paper. What matters is good lighting. Natural light works best, or a white LED desk lamp. Yellow lighting messes with colors. I once thought I was placing a warm orange sofa, only to discover under daylight it was actually a muddy brown. Learned that lesson the hard way.
Open your sticker packs and lay them out nearby, but don't start peeling yet. It's like prepping ingredients before you cook—you want to see what you're working with.
Where to Start? This Order Matters
The scenes that look best all follow one rule: background first, foreground last.
Think about it like painting a landscape. You paint the distant mountains first, then the trees in the middle, then the person in front. Stickers work the same way.
Start with your backdrop—walls, sky, distant scenery. Then add mid-ground elements like furniture or medium-sized plants. Finally, place your foreground details: small objects, characters, anything that should look closest to the viewer.
Get this order wrong and your scene looks flat and confusing. Trust me, I've tried doing it backwards and it never works.
Creating Depth Without Overcrowding
Here's something that took me way too long to figure out: empty space is your friend.
My early scenes were packed. Every inch had something on it. They looked cluttered and chaotic. Now I aim for scenes where about 30% of the space stays empty. It gives the eye somewhere to rest and makes the placed elements pop.
Three practical tips for better depth:
Place larger items first. They anchor your scene and give you reference points for everything else. Put that big couch down, then figure out where the coffee table goes relative to it.
Stick to 3-4 main colors. I know those sticker packs come with every color imaginable, but resist the urge to use them all. A scene with cohesive colors looks intentional. One with rainbow chaos looks like a toddler got loose with stickers.
Sometimes less really is more. I made a bedroom scene with just a bed, one plant, a window, and a small rug. That's it. Four stickers. And it's one of my favorites because everything has room to breathe.
Common Scene Types and Their Challenges
Indoor scenes are forgiving but need attention to perspective. That bookshelf in the back should look smaller than the chair in front. If everything's the same size, your room looks weird and flat.
Nature scenes need variety in height. Mix tall trees, medium bushes, and ground cover. All the same height looks like a hedge maze, not a forest.
Street scenes need clear pathways. Leave visual "roads" or walking paths. If you block every route with objects, the scene feels cluttered and confusing.
My Biggest Failures (So You Can Avoid Them)
I once spent an hour on a coffee shop scene, placed the final sticker, stepped back... and realized I'd put the counter on the ceiling. The whole thing was upside down. Had to start over.
Another time I used stickers from three different sets without checking if the art styles matched. One was realistic, one was cartoonish, one was watercolor-style. Together they looked like three different artists had a fight on my base board.
And then there was the "too many plants" incident. I thought a jungle-themed bedroom would look cool. It looked like the room was being reclaimed by nature. Not the cozy vibe I was going for.
Telling a Story With Your Scene
Once you get comfortable with the basics, try this: build a scene that suggests a story.
Instead of just placing random furniture, imagine who lives there. A coffee cup left on the table suggests someone was just there. An open book on the couch implies someone reading. A pair of shoes by the door means someone came home.
These little narrative details make scenes feel alive. My favorite scene shows a tiny kitchen with flour spilled on the counter and a half-finished cake. You can almost see the baker stepping away for a moment.
When Things Go Wrong
Sometimes a sticker rips. Sometimes you place something and it just looks wrong. Sometimes you finish and realize the whole composition is off-balance.
Here's my advice: walk away. Seriously. Leave it for an hour, or until tomorrow. Come back with fresh eyes. Half the time, what looked like a disaster actually works fine. The other half, you'll immediately see what needs fixing.
And if it's truly unsalvageable? Peel it all off and start fresh. The stickers are cheap. Your time and peace of mind matter more.
Final Thoughts
Making diorama scenes isn't about perfection. It's about the process—the quiet focus of placing each element, the satisfaction of seeing a tiny world come together.
Some of my favorite scenes are ones that would never win any awards. They're simple, a little imperfect, but they make me smile when I look at them.
Start simple. Make mistakes. Learn as you go. That's really all there is to it.
Perguntas Frequentes
Do I need any special tools to make diorama scenes?
Honestly, no. Your fingers are enough. Some people like using tweezers for tiny stickers, but I've made dozens of scenes just using my hands. A clean, flat surface is more important than any tool.
What if I make a mistake while placing a sticker?
Don't panic. Most scene stickers can be carefully peeled off and repositioned, especially if you catch it early. If it's really stuck, sometimes you can work around it or incorporate it into a different part of the scene.
How many stickers should I use in one scene?
There's no magic number, but here's what I've learned: less is often more. A scene with 8-12 well-placed stickers usually looks better than one crammed with 30. Give your elements room to breathe.
Can I mix stickers from different sets?
Absolutely! Some of my favorite scenes mix elements from 2-3 different packs. Just keep an eye on scale—you don't want a tiny person next to a giant coffee cup unless that's intentionally whimsical.
How long does it take to make a good diorama scene?
For me, anywhere from 15 minutes to an hour. The planning takes longer than the actual sticking. Rush it and you'll end up with something that looks thrown together. Take your time with placement.