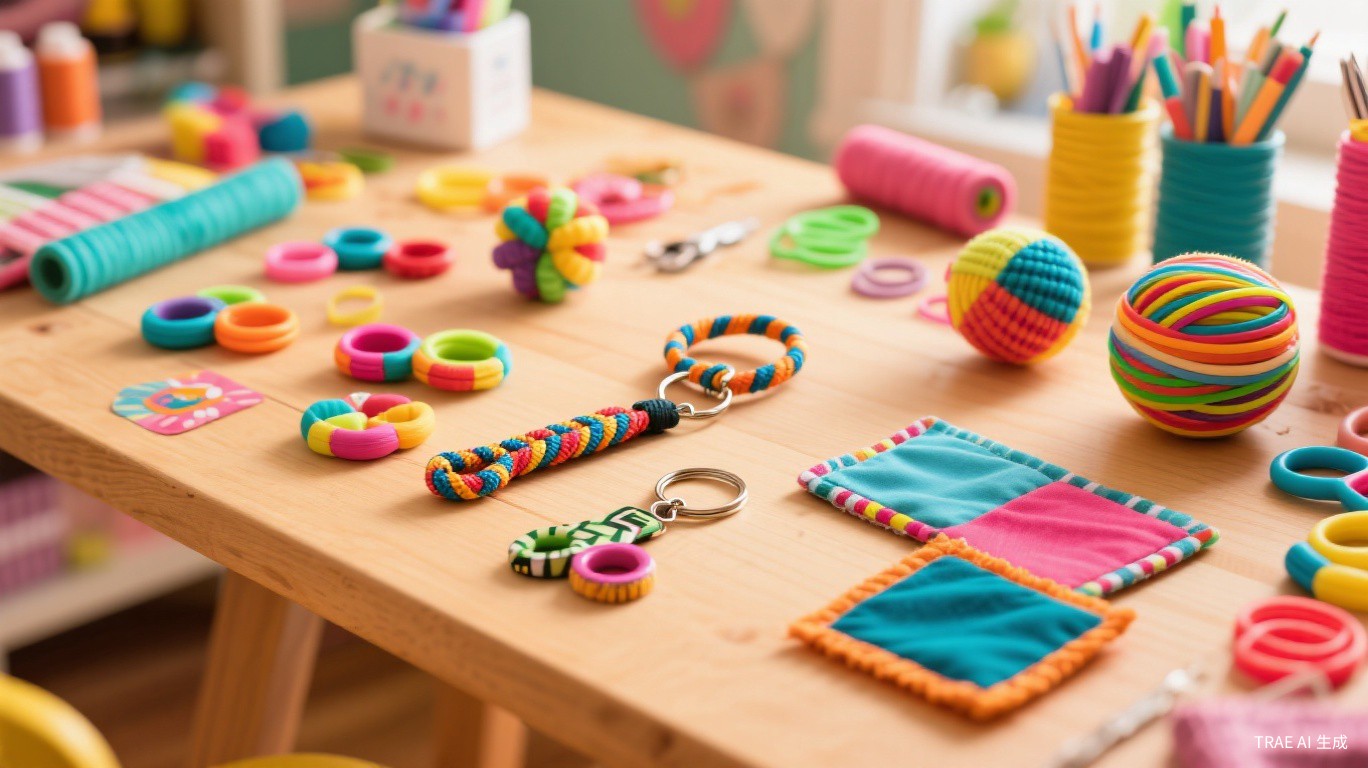
DIY Fidget Toys You Can Make at Home: 10 Easy Projects 2026
Katie Morgan
Author
Why Make Your Own Fidget Toys?
I started making fidget toys at home three years ago when my oldest daughter came home from occupational therapy with a tangle toy and promptly lost it within 48 hours. After replacing it twice at eight bucks a pop, I thought, "There has to be a better way." Turns out, there is. You can make most fidget toys at home for pennies on the dollar, and honestly, they are often more satisfying than the store-bought versions.
The cost savings are real. A basic fidget pack at the store runs you $10 to $15 for a handful of small plastic toys. I can make ten different fidgets with materials from my junk drawer and a trip to the dollar store. But money is only part of the story. When you make your own fidgets, you control everything: the texture, the weight, the size, the color. My sensory-seeking son likes heavy, textured things. My daughter prefers smooth and lightweight. No commercial kit gives you that level of customization.
There is also something genuinely therapeutic about the making process itself. Braiding paracord, rolling beads into a ball, wrapping rubber bands, these are all repetitive, focused tasks that scratch the same itch as the fidget itself. My kids and I spend Saturday afternoons making these together, and it has become one of our favorite rituals.
Below are ten projects we have tested extensively in our house. I have ranked them by difficulty so you can start easy and work your way up.
Project 1: Rubber Band Ball
Difficulty: Beginner | Time: 15 minutes | Cost: Under $2
This is where everyone should start. A rubber band ball is satisfying to squeeze, bounce, and roll in your palm. It is basically a homemade stress ball that never pops.
Materials needed: - 1 small rubber band (to form the core) - 50 to 100 assorted rubber bands - Optional: a marble or bouncy ball for the center
Instructions: 1. Take a small rubber band and wrap it around your index finger, then slide it off and fold it into a tight wad. 2. Wrap three more rubber bands around the wad in different directions to form a small core. 3. Continue wrapping rubber bands around the core, alternating directions with each layer. 4. As the ball grows, use larger rubber bands to cover the surface evenly. 5. Keep going until the ball reaches your desired size, roughly the size of a tennis ball works best.
Pro tip: Use rubber bands of the same size within each layer for a smoother surface. The varied tension creates a satisfying give when you squeeze it. My son's rubber band ball is the size of a softball now and he has been adding to it for over a year. It is basically a family heirloom at this point.
Project 2: Paperclip Chain
Difficulty: Beginner | Time: 10 minutes | Cost: Under $1
This is the simplest fidget you can make, and it is surprisingly addictive. The smooth clicking of metal links sliding against each other is perfect for people who like quiet, repetitive motion.
Materials needed: - 20 to 40 standard paperclips - Needle-nose pliers (optional but helpful)
Instructions: 1. Open one paperclip slightly and thread a second one through it. 2. Close the first paperclip back to its original shape. 3. Repeat, linking each new paperclip to the previous one. 4. Continue until the chain reaches your desired length. 5. Connect the last paperclip to the first to form a loop, or leave it as a strand.
Pro tip: For a more interesting texture, alternate between jumbo and standard-sized paperclips. You can also bend individual clips into triangles or squares before linking them for a chunkier feel. I keep a paperclip chain in my purse and pull it out during boring wait times. Nobody even notices.
Project 3: Duct Tape Tangle
Difficulty: Beginner | Time: 20 minutes | Cost: Under $3
This mimics the popular Tangle toy using duct tape and cardboard. It twists, turns, and clicks at each joint in a deeply satisfying way.
Materials needed: - Cardboard (cereal box works perfectly) - Duct tape in assorted colors - Scissors - Ruler
Instructions: 1. Cut the cardboard into strips roughly 1 inch wide and 3 inches long. 2. Cover each strip completely with duct tape, folding the tape over the edges. 3. Round the corners of each strip with scissors. 4. Cut small slits (about half an inch) at each end of every strip. 5. Link two strips together by sliding the slits together at 90-degree angles. 6. Continue adding strips to build your tangle chain.
Pro tip: The tighter you make the slit connections, the more satisfying the click will be when each segment rotates. Use two different colors of duct tape and alternate them for a cool visual effect. My daughter made one in every color of duct tape she could find. We have about fifteen of these things floating around the house.
Project 4: Fabric Sensory Square
Difficulty: Beginner | Time: 25 minutes | Cost: Under $4
This is a quiet, soft fidget that is perfect for classrooms or situations where you need something discreet. Different fabric textures on each side provide varied tactile input.
Materials needed: - 4 to 6 different fabric scraps (felt, satin, corduroy, fleece, denim, velvet) - Sewing needle and thread (or fabric glue for no-sew version) - Polyester stuffing or dried rice/lentils - Ribbon or trim (optional)
Instructions: 1. Cut two squares of fabric, roughly 4 by 4 inches, from different textured materials. 2. Cut additional smaller squares or strips from other fabrics. 3. Sew or glue the textured pieces onto one side of your main square. 4. Place the two main squares together, textured sides facing inward. 5. Sew around three sides, flip right-side out, then stuff lightly with polyester fill or fill halfway with rice for added weight. 6. Sew or glue the fourth side closed.
Pro tip: Adding a ribbon loop on one corner gives you something extra to rub between your fingers. Rice filling makes it heavier and adds a subtle shifting sensation when you squeeze it. My youngest likes to warm hers in the microwave for ten seconds before bed. It is like a tiny, textured heating pad.
Project 5: Paracord Monkey Fist
Difficulty: Intermediate | Time: 30 minutes | Cost: Under $3
This one takes a little practice, but the result is a heavy, dense fidget ball that feels incredibly premium. The woven texture is perfect for tactile seekers.
Materials needed: - 6 to 8 feet of 550 paracord - A marble, bouncy ball, or large bead for the core - Scissors - Lighter (to seal the cord ends) - Tape measure
Instructions: 1. Find the midpoint of your paracord and hold it against the marble. 2. Wrap the cord around your three middle fingers three times vertically. 3. Remove your fingers carefully and wrap the cord horizontally around the vertical wraps three times. 4. Thread the cord through the center and wrap it diagonally three times. 5. Pull each wrap tighter gradually, working around the sphere until the knot is snug around the marble. 6. Trim the excess cord and melt the ends with a lighter to prevent fraying.
Pro tip: This takes a few tries to get right. Watch a video tutorial the first time. Once you get the pattern down, you can make one in under ten minutes. Use glow-in-the-dark paracord for a fidget that doubles as a nightstand toy. I made matching ones for all three kids in their favorite colors, and they actually requested these over store-bought fidgets for their Christmas stockings.
Project 6: Bead Stress Ball
Difficulty: Intermediate | Time: 20 minutes | Cost: Under $5
This homemade stress ball has a unique, crunchy texture that store-bought gel balls cannot replicate. The beads inside shift and roll in a way that is genuinely mesmerizing.
Materials needed: - A balloon (thick water balloon style works best) - Microbeads, plastic pellets, or kinetic sand - A funnel or plastic bottle with the top cut off - Scissors
Instructions: 1. Stretch the balloon several times to loosen it up. 2. Place the balloon neck over the funnel opening. 3. Pour microbeads or pellets into the balloon until it is about two-thirds full. 4. Let the air out gently and tie the balloon closed. 5. For extra durability, cut the neck off a second balloon and stretch it over the first one.
Pro tip: Two layers of balloon are essential if you want this to last more than a day. I learned that the hard way when my son popped one on the kitchen table and we found microbeads for weeks. A mix of microbeads and a tablespoon of rice gives you both a crunchy and rolling texture at the same time.
Project 7: Texture Board
Difficulty: Intermediate | Time: 35 minutes | Cost: Under $6
A texture board is a flat surface with different materials glued on for rubbing, scratching, and touching. It is excellent for kids who need varied sensory input and do not want something they have to squeeze or manipulate.
Materials needed: - A sturdy base (wooden plaque, thick cardboard, or a clipboard) - Assorted textured materials: sandpaper, faux fur, bubble wrap, corrugated cardboard, smooth fabric, Velcro, textured shelf liner, aluminum foil - Strong craft glue or hot glue gun - Scissors
Instructions: 1. Cut your textured materials into equal-sized squares or strips, roughly 2 by 2 inches. 2. Arrange them on your base in a grid pattern. 3. Glue each piece down firmly, pressing for 30 seconds per piece. 4. Let the board dry completely for at least two hours. 5. Optional: seal the edges with duct tape for a cleaner finish.
Pro tip: Let your kids pick the textures. My daughter chose materials I never would have guessed, like the rough side of Velcro and the crinkly side of aluminum foil. She knows what her hands want to touch. I mounted ours on a clipboard so it stands up on its own and can lean against her desk.
Project 8: Magnetic Desk Toy
Difficulty: Intermediate | Time: 15 minutes | Cost: Under $8
Small neodymium magnets create an endlessly entertaining desk fidget. You can build, sculpt, snap, and reshape them in infinite configurations. This is my personal favorite for when I am on long phone calls.
Materials needed: - 50 to 200 small neodymium sphere magnets (3mm to 5mm) - A small container or tin for storage
Instructions: 1. This project is less about building and more about playing. Simply purchase a set of small neodymium magnets. 2. Start by forming them into a long chain. 3. Experiment with shapes: cubes, triangles, pyramids, bracelets. 4. Try making a flat sheet by laying them in a grid, then fold the sheet into 3D shapes.
Pro tip: Buy from a reputable seller. Cheap neodymium magnets chip and lose their coating quickly. Look for nickel-coated magnets with good reviews. Keep these away from young children and electronics. I keep a set of 200 in a small tin on my desk and honestly, they are the reason I have not bought a commercial fidget in over a year.
Project 9: Infinity Cube from Cardboard
Difficulty: Advanced | Time: 45 minutes | Cost: Under $3
An infinity cube folds continuously in on itself, creating a mesmerizing flipping motion. The store-bought versions cost $10 to $20, but you can make one from cardboard and tape.
Materials needed: - Sturdy cardboard (corrugated or double-layer) - Duct tape or packing tape - Ruler and pencil - Scissors or craft knife - Cutting mat
Instructions: 1. Cut eight squares of cardboard, each roughly 2 by 2 inches. 2. Cover each square with tape for durability. 3. Arrange the squares in two rows of four, alternating the tape hinge direction. 4. Tape adjacent squares together on one side to create hinges, alternating which side gets taped for each pair. 5. Test the fold: the cube should be able to fold continuously in on itself from any direction. 6. Reinforce any hinges that feel loose with an extra strip of tape.
Pro tip: The hinge placement is the tricky part. Think of it like a chain: each square connects to the next with a hinge, and the hinges alternate between horizontal and vertical orientation. It took me three attempts to get the first one right, but now I can make them in my sleep. Wrapping the squares in colored duct tape before assembly makes them look way more polished.
Project 10: Weighted Rice Sock
Difficulty: Beginner | Time: 10 minutes | Cost: Under $2
This is the simplest fidget on the list, but do not underestimate it. A weighted rice sock provides deep pressure input that is incredibly calming. It is part fidget, part stress reliever, part hand warmer.
Materials needed: - A clean tube sock (crew length works best) - 1 to 2 cups of uncooked rice - A rubber band or string - Optional: a few drops of lavender essential oil
Instructions: 1. Pour one to two cups of rice into the sock. More rice means more weight. 2. Add a few drops of lavender oil to the rice before pouring if you want aromatherapy benefits. 3. Tie the sock closed tightly with a rubber band or string. 4. Optional: microwave for 30 to 45 seconds for a warm fidget (test the temperature before handing it to a child).
Pro tip: Use long-grain rice for a better feel. Instant rice is too small and can leak through the sock weave. Two cups of rice in a tube sock gives you roughly a half-pound fidget that drapes beautifully over your hand. My daughter brings hers to every car ride and has not asked to stop for gas station snacks since we started making these, because she is too busy squishing rice between her fingers.
Tips for Making DIY Fidgets Last
After three years and probably a hundred homemade fidgets, here is what I have learned about durability:
- Reinforce stress points. Any place where two pieces connect is going to take the most abuse. Double up your tape, add an extra stitch, or use hot glue in addition to other adhesives.
- Use quality materials when it matters. Cheap duct tape peels and loses stickiness. Cheap rubber bands snap. Spend the extra dollar on name-brand versions of materials that need to hold up.
- Make extras. If you are crafting with kids, make two of everything. One will get lost within a week. Having a backup saves you from emergency craft sessions on school nights.
- Store them properly. Keep fidgets in a designated container. My kids each have a small pencil pouch for their fidgets. Everything has a home, and things that have homes tend to not get lost as quickly.
- Teach basic repairs. My eight-year-old can re-tape a duct tape tangle and re-tie a rice sock. Teaching kids to fix their own fidgets builds responsibility and extends the life of every project.
Where to Find Inspiration for More Projects
Once you start making your own fidgets, you will see potential projects everywhere. Old zippers become zipper pulls. Broken jewelry becomes charm fidgets. Scraps of fabric become sensory bookmarks. The junk drawer is genuinely the best craft store for fidget makers.
Pinterest and YouTube are full of tutorials, but honestly, some of the best fidgets we have made came from accidents. My son tried to make a paracord bracelet and ended up with something closer to a stress ball. It is now his favorite possession.
The key is to start. Pick the easiest project on this list, gather your materials, and sit down with your kids this weekend. You might be surprised by what you come up with together.
Frequently Asked Questions
What materials do I need to make DIY fidget toys?
Most DIY fidget toys can be made with common household materials like rubber bands, duct tape, paracord, fabric scraps, beads, paperclips, and rice. You likely already have everything you need in a junk drawer or craft bin. Specialized items like neodymium magnets can be found online for a few dollars.
Are homemade fidget toys safe for kids?
Homemade fidget toys are safe when made properly and used under age-appropriate supervision. Always avoid small parts for children under three, use non-toxic materials, and check for sharp edges. Hot glue and scissors should only be handled by adults or older kids with supervision.
How long do DIY fidget toys typically last?
Durability varies by project and usage intensity. A paracord monkey fist or rubber band ball can last months or even years with normal use. Duct tape and paperclip projects may need occasional repairs. Making them with quality materials and reinforcing stress points extends their lifespan significantly.
Can DIY fidget toys be as effective as store-bought ones?
Absolutely. The sensory feedback from a homemade fidget can be just as satisfying as a commercial one. In fact, many people prefer DIY versions because they can customize the texture, weight, and resistance to match their exact preferences. The act of making them is also a calming activity in itself.
What are the easiest DIY fidget toys for beginners?
The rubber band ball and paperclip chain are the simplest projects, requiring only one material and no tools. The duct tape tangle and fabric sensory square are also beginner-friendly. Start with these before moving to more advanced projects like the paracord monkey fist or infinity cube.